The following types of microscopes are in use now in Microbiology.
- Bright-field or light microscope
- Dark field microscope
- Phase contrast microscope
- Fluorescence microscope
- Electron microscope
Properties of a microscope
A good microscope should have at least three properties:
1. Good resolution: Resolution power refers to the ability to produce separate images of closely placed objects so that they can be distinguished as two separate entities.
The resolution power of
- Unaided human eye is about 0.2 mm (200 μm).
- Light microscope is about 0.2 μm.
- Electron microscope is about 0.5 nm.
Resolution depends on refractive index of the medium. Oil has a higher refractive index than air; hence, use of oil enhances the resolution power of a microscope.
2. Good contrast: This can further be improved by staining the specimen. When the stains bind to the cells, the contrast is increased.
3. Good magnification: This is achieved by use of lenses. There are two types of concave lenses used:
- Ocular lens with a magnification power of 10x.
- Objective lens-scanning (4x), low power (10x), high power (40x) and oil immersion (100x).
Total magnification of a field is the product of the magnification of objective lens and ocular lens:
- Scanning field (40x)
- Low power field (100x)
- High power field (400x) and
- Oil immersion field (1000x)

BRIGHT-FIELD OR LIGHT
MICROSCOPE
The bright-field or light microscope forms a dark
image against a brighter background, hence the name.
Structure
The parts in a bright-field microscope are divided into three groups (Fig. 2.1):
Mechanical Parts
- Base: It holds various parts of microscope, such as the light source, the fine and coarse adjustment knobs.
- C-shaped arm: It holds the microscope, and it connects the ocular lens to the objective lens.
- Mechanical stage: The arm bears a stage with stage-clips to hold the slides and the stage-control knobs to move the slide during viewing. It has an aperture at the center that permit light to reach the object from the bottom.
Magnifying Parts
- Ocular lens: The arm contains an eyepiece that bears an ocular lens of 10x magnification power. Microscopes with two eye pieces are called as binocular microscopes.
- Objective lens: The arm also contains a revolving nose piece that bears three to five objectives with lenses of differing magnifying power (4x, 10x, 40x and 100x).
Illuminating Parts
- Condenser: It is mounted beneath the stage which focuses a cone of light on the slide.
- Iris diaphragm: It controls the light that passes through the condenser.
- Light source: It may be a mirror or an electric bulb.
- Fine and coarse adjustment knobs: They sharpen the image.
Working Principle of Bright Field Microscope
The rays emitted from the light source pass through the iris diaphragm and fall on the specimen. The light rays passing through the specimen is gathered by the objective and a magnified image is formed. This image is further magnified by the ocular lens to produce the final magnified virtual image (Fig. 2.2).

DARK FIELD MICROSCOPE
Principle of Dark Field Microscope
- In dark field microscope, the object appears bright against a dark background. This is made possible by use of a special dark field condenser (Fig. 2.2).
- The dark field condenser has a central opaque area that blocks light from entering the objective lens directly and has a peripheral annular hollow area which allows the light to pass through and focus on the specimen obliquely.
- Only the light which is reflected by the specimen enters the objective lens whereas the unreflected light does not enter the objective. As a result, the specimen is brightly illuminated; but the background appears dark.
Applications of Dark Field Microscope
- Dark field microscope is used to identify the living unstained cells and thin bacteria like spirochetes which cannot be visualized by light microscopy.
PHASE CONTRAST MICROSCOPE
As per its name, in phase contrast microscope, the contrast is enhanced. This microscope visualizes the unstained living cells by creating difference in contrast between the cells and water. It converts slight differences in refractive index and cell density into easily delectable variations in light intensity. Contrast can also be enhanced by staining the specimen, but as staining kills the microbes, the properties of living cells cannot be studied.

Principle of Phase Contrast Microscope
The condenser is similar to that of dark field microscope, consists of an opaque central area with a thin transparent ring. which produces a hollow cone of light.
- As this cone of light passes through a cell, some light rays are bent due to variations in density and refractive index within the specimen and are retarded by about one-fourth of a wavelength (Fig. 2.3).
- The undeviated light rays strike a phase ring in the phase plate, (a special optical disk located in the objective), while the deviated rays miss the ring and pass through the rest of the plate.
- The phase ring is constructed in such a way that the undeviated light passing through it is advanced by one fourth of a wavelength, the deviated and undeviated waves will be about half wavelength out of the phase and will cancel each other when they come together to form an image (Fig. 2.3).
- The background, formed by undeviated light, is bright, while the unstained object appears dark and well defined.
The light rays go through ->condenser ->specimen (e.g bacteria) -> phase rings->objective lens ->ocular lens.
Applications of Phase Contrast Microscope
Phase contrast microscopy is especially useful for studying:
- Microbial motility
- Determining the shape of living cells, and
- Detecting bacterial components, such as endospores and inclusion bodies which become clearly visible because they have refractive indices markedly different from that of water.
FLUORESCENCE MICROSCOPE
The "fluorescence microscope" refers to any microscope that uses fluorescence property to generate an image.

Principle of Fluorescence Microscope
When fluorescent dyes are exposed to ultraviolet (UV) rays, they become excited and are said to fluoresce, i.e. they convert this invisible, short wavelength rays into light of longer wavelengths (i.e. visible light) (Fig. 2.4 ).
- The source of light may be a mercury lamp which emits rays that pass through an excitation filler.
- The excitation filler is so designed that it allows only short wavelength UV light (about 400 nm, called as the exciting wavelength of light) to pass through; blocking all other long wavelength rays.
- The exciting rays then get reflected by a dichromatic mirror in such a way that they fall on the specimen which is priorly stained by fluorescent dye. Then the specimen is focused under the microscope.
- The fluorescent dye absorbs the exciting rays of short wavelength, gets activated and in turn emits fluorescent rays of higher wavelength.
- A barrier filter positioned after the objective lenses removes any remaining ultraviolet light, which could damage the viewer's eyes, or blue and violet light, which would reduce the image's contrast.
Applications of Fluorescence Microscope
Epi-fluorescence microscope: It is the simplest formal of fluorescence microscope, which has the following applications.
- Auto fluorescence: Certain microbes directly fluoresce when placed under UV lamp, e.g. Cyclospora (a protozoan parasite).
- Microbes coated with fluorescent dye: Certain microbes fluoresce when they are stained non-specifically by fluorochrome dyes.
- Acridine orange dye is used for the detection of malaria parasites by a method called as quantitative buffy coat (QBC) examination.
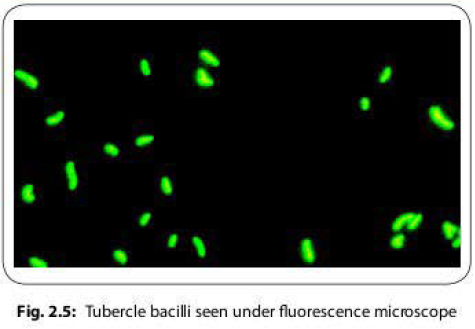
- Auramine phenol is used for the detection of tubercle bacilli (Fig. 2.5).
- Immuno-fuorescence: It uses florescent dye tagged immunoglobulins to detect cell surface antigens or antibodies bound to cell surface antigens. There are two types-direct and indirect immuno-fluorescence test.
Confocal microscope: It is an advanced design of fluorescence microscope, which uses optical sectioning to get better resolution of the fluorescent image.
ELECTRON MICROSCOPE
An electron microscope (EM) uses accelerated electrons as a source of illumination. Because the wavelength of electrons can be up to 100,000 times shorter than that of visible light photons, the EM has a much better resolving power than a light microscope; hence, it can reveal the details of flagella, fimbriae and intra-cellular structures of a cell. It was invented by German physicist Ernst Ruska in 1931. Differences between light microscope and EM are listed in Table 2.2. Electron microscopes are of two types:
1. Transmission electron microscope (most common type) (Fig. 2.6)
2. Scanning electron microscope

Transmission Electron Microscope
Specimen Preparation
The specimen to be viewed under EM should be able to maintain its structure when it is bombarded with electrons.
Hence, only very thin specimens (20-100 nm thickness) are suitable for EM. However, bacterial cells are thicker than this; hence, they need to be sliced into thin layers. To prepare the thin specimen, the following steps are needed:
- Fixation: Cells are fixed by using glutaraldehyde or osmium tetroxide for stabilization.
- Dehydration: Specimen is then dehydrated with organic solvents (e.g. acetone or ethanol).
- Embedding: Specimen is embedded in plastic polymer and then, is hardened to form a solid block. Most plastic polymers are water insoluble; hence, complete dehydration of specimen is must before embedding.
- Slicing: Specimen is then cut into thin slices by an ultra-microtome knife. Such thin slices of specimen are mounted on a metal slide (copper).

Electron Pathway
Electrons are generated by electron gun, which travel in high speed. The medium of travel in EM should be a fully vacuum path because in air path, electrons can get deflected by collisions with air molecules.
- Electron pass through a magnetic condenser and then bombard on the thin sliced specimen mounted on the copper slide.
- The specimen scatters electrons passing through it, and then the electron beam is focused by magnetic lenses (objective lens followed by projector lenses) to form an enlarged, visible image of the specimen on a fluorescent screen (Fig. 2.7).
- A denser region in the specimen scatters more electrons and therefore appears darker in the image since fewer electrons strike that area of the screen. In contrast, electron-transparent regions are brighter.
Measures to increase the Contrast of EM
- Staining: Like light microscopy, in EM also, the specimens can be stained. Here, the stains used are solutions of heavy metaI salts like lead citrate and uranyl acetate which bind to the cell structures and make them more electron opaque, thus increasing the contrast in the material.
- Negative staining: The specimen is spread out in a thin film with heavy metals like phospho-tungstic acid or uranyl acetate.
- Heavy metals do not penetrate the specimen but render the background dark, whereas the specimen appears bright in photographs.
- Negative staining is an excellent method to study the structure of viruses, bacterial gas vacuoles, and other similar material.
- Shadowing: Specimen is coated with a thin film of platinum or other heavy metal at 45° angle so that the metal strikes the microorganism on only one side.
- The area coated with metal scatters electrons and appears light in photographs, whereas the un-coated side and the shadow region created by the object appears dark.
- This technique is particularly useful in studying virus morphology, bacterial flagella, and plasmids.

Freeze-etching Technique: It is an alternate method for specimen preparation to disclose the shape of organelles within the microorganisms.
- Cells are rapidly frozen in liquid nitrogen and then warmed to 100°C in a vacuum chamber. This makes the cells weaker so that the cells can be fractured by a knife exposing the internal organelles. The knife should be pre-cooled with liquid nitrogen (- 196°C).
- Sublimation: The specimen is left in high vacuum for a minute or more so that some of the ice can sublimate away and uncover more structural details.
- Finally, the exposed surfaces are shadowed and coated with layers of platinum and carbon to form a replica of the surface.
- After the specimen has been removed chemically, this replica is studied in the TEM, which provides a detailed, three-dimensional view of intracellular structure.
- In freeze-etching, the danger of artefacts is minimal as the cells are frozen quickly rather than subjected to chemical fixation as done in conventional specimen preparation.
Scanning Electron Microscope (SEM)
Scanning electron microscope has been used to examine the surfaces of microorganisms in great detail. It has a resolution of 7 nm or less. The SEM differs from TEM, in producing an image from electrons emitted by an object's surface rather than from transmitted electrons.
Further reading:

No comments:
Post a Comment